 A cremator is a great method of mortality removal. It uses relatively little energy, works quickly to reduce mortality to ash, and kills all potential pathogens in the process. Properly setting up and troubleshooting a cremator are imperative if the unit is going to function the way it was designed to, so we are here to walk you through how to set up your cremator and make sure everything is working flawlessly.
Before you can set up a cremtor, you must choose the right location on your farm. Ideally, the cremator will be on a level, concrete pad, as it provides the best biosecurity. However, a level gravel pad will also work just fine. Avoid letting weeds or grass grow too tall, too close to the burn unit, to prevent any accidents. Consider the prevailing winds of the farm when choosing a location, so smoke doesn’t accidentally end up in your neighbors house. If a shelter is desired, make sure there is adequate clearance around the exhaust stack and burner unit, as the stacks get very hot. Also check with local and state laws if an afterburner is required.
Follow these steps to begin setting up your cremator:
- Remove the burner from its packaging and mount it to the tank.
- Connect the supply gas lines (check with your gas supplier for proper sizing) and check for leaks.
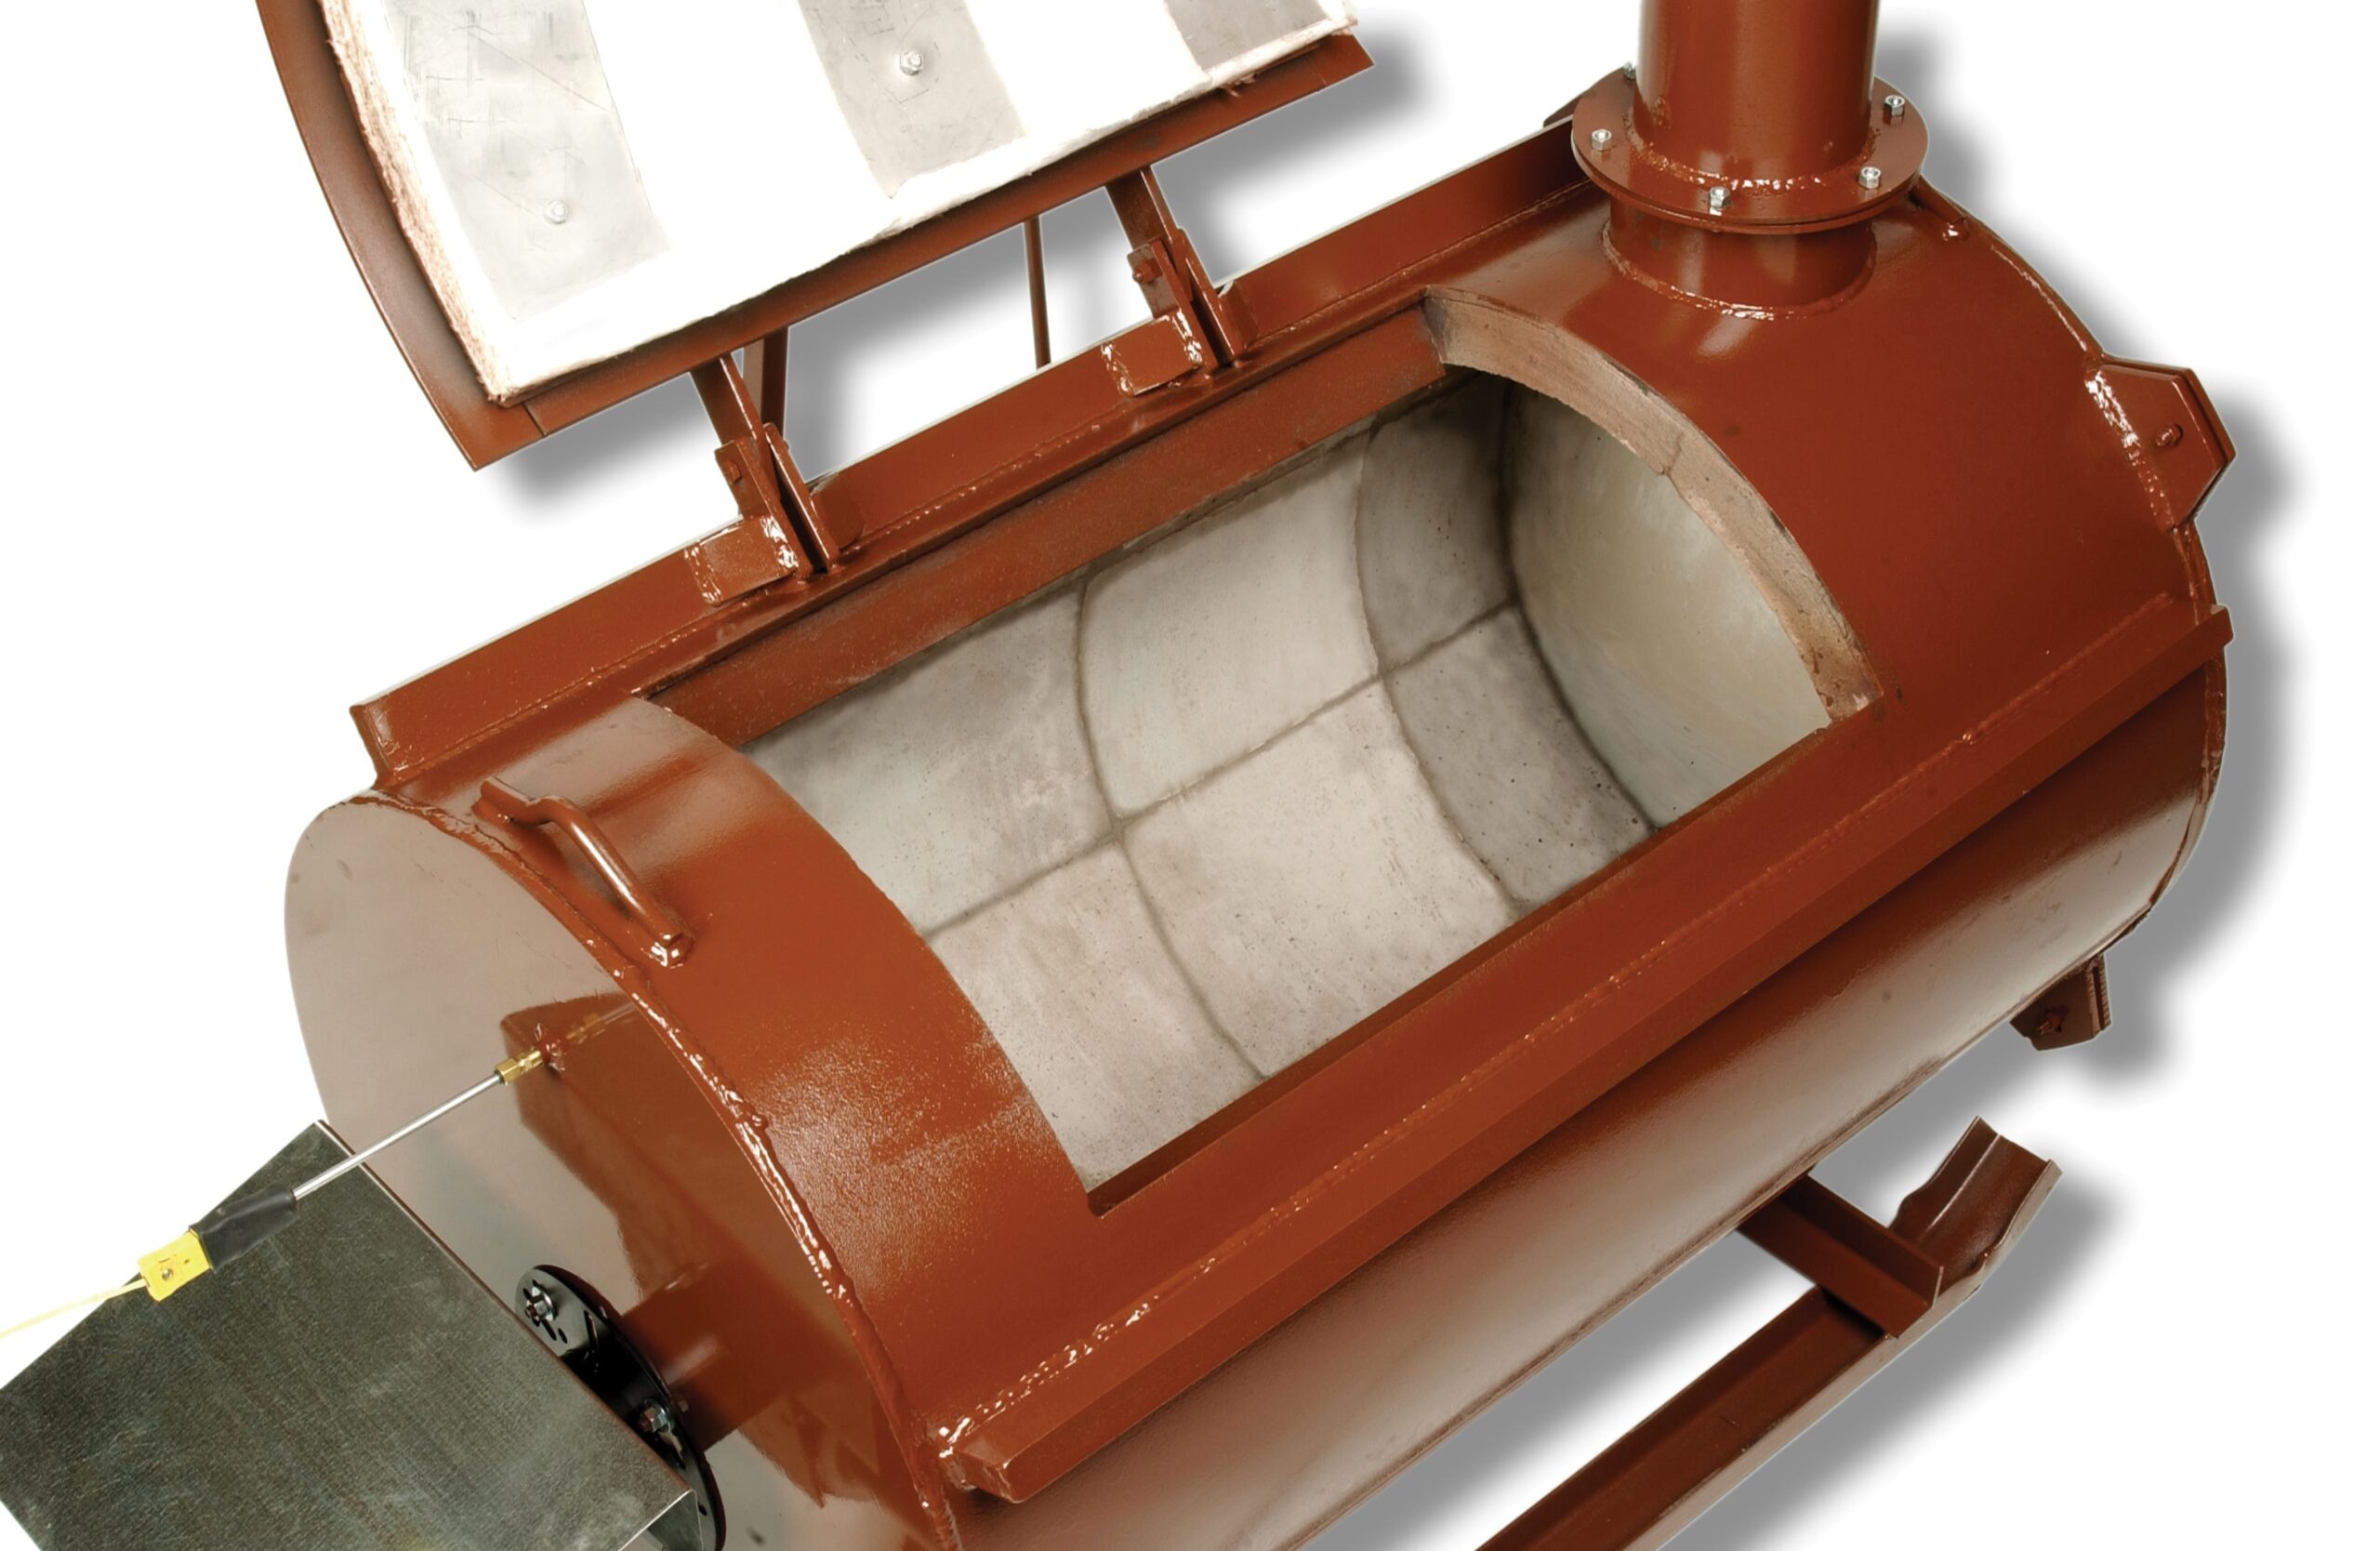
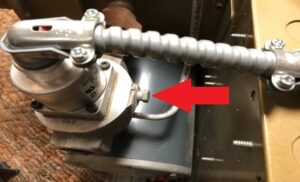
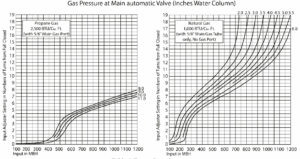
- Check incoming pressure/water column inches. The Natural Gas (NG) minimum should be 5.5″ water column. Liquid Propane (LP) minimum should be 8″ water column. See Image 1 for gas port location.
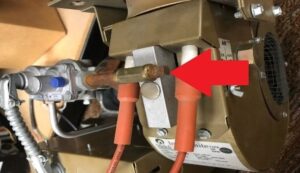
- Check the pilot water column inches. This should be preset to approximately 3.5″ for NG or LP.

Image 2 – Port to check pilot pressure 
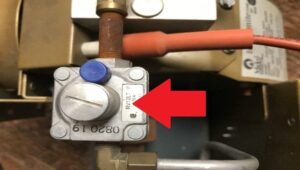
Image 3 – Pilot adjuster is under the cap - Plug the unit into the proper power supply – 120V or 220V. NEVER OPEN THE DOOR WHILE THE UNIT IS RUNNING.
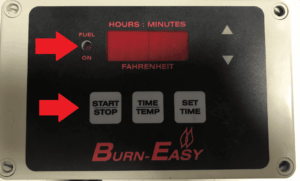
- Press the Start/Stop button on the control. The time will show 2 hours. Press Start again and the unit will begin the start up process. The blower will start after a few seconds, the fuel solenoid will open and indicator light on the control will come on while the solenoid is open. If the unit fails to light (most likely because there is air in the line), repeat this step.

- After the unit burns briefly, press the Start/Stop button. Adjust the burner valve for the proper setting for your unit (see chart). Failing to do so will most likely prematurely damage the burner unit as well as the tank and exhaust stack.

- Remove the protective nut for access to the burner adjustment valve, turn the adjuster screw clockwise/in until it is snug, then turn it counter-clockwise/out to the proper setting. Image 8
- Set the air mix at 75% open to start and adjust the opening to get the least amount of smoke.
- You are now ready to load the unit for a burn. Note: The unit should never be loaded more than three quarters full and nothing should be within 12″ of the burner.
NOTE
-Optional grates will help optimize a burn but are not required.
-Clean out the ash after a burn has cooled and before the next burn.
Proper maintenance of the burner unit is necessary to keep it working properly.
- Check the spacing of the electrode and flame sensor to the ground bar. Use an eighth inch drill bit to check the spacing.
- Remove any carbon or dirt from the ignitor assembly.
- Check for damage or crack in the electrode and flame sensor.
NOTE
When an afterburner is used, the afterburner NEEDS to be running BEFORE the main burner. It also needs to be set to run thirty minutes after the main burner turns off. Failing to do so can result in damage to the afterburner unit.